LLBlogHome upgrade tips and tricks help you improve your home in three steps: fix functional problems first, add efficiency upgrades second, and spend on décor last. Most homes see the biggest visible improvement from paint, lighting, and storage — all achievable on a small budget.
| Upgrade | Cost Tier (Est.) | Skill Level | Renter-Safe? | Best For |
| Paint refresh (walls, trim, doors) | 50–150 | Beginner | No | Fastest visual transformation |
| Bulb temperature & fixture swap | 20–120 | Beginner | Mostly yes | Rooms that feel “off” or dull |
| Cabinet hardware swap | 40–150 | Beginner | No (but reversible) | Kitchens that feel dated |
| Shelving & storage systems | 50–400 | Beginner–Intermediate | Partially | Small spaces and clutter |
| Caulk, weatherstripping, draft sealing | 10–60 | Beginner | Yes | Cutting energy waste |
| Smart thermostat | 100–300 | Intermediate | No | Long-term energy savings |
| Cabinet painting or refacing | 150–600 | Intermediate | No | Kitchen modernization on a budget |
| Peel-and-stick backsplash/wallpaper | 30–200 | Beginner | Yes | Renters and commitment-phobes |
Cost figures are rough estimates for a single average-sized project. Actual prices vary by region, materials, and room size.
How to Plan Home Upgrades Before You Spend a Dollar
The most expensive home upgrade mistake isn’t buying the wrong product — it’s doing things in the wrong order. A simple framework prevents that.
The Fix–Improve–Decorate Order of Operations
Work through upgrades in this sequence: fix, then improve, then decorate.
Fixing means dealing with anything broken, leaking, cracked, or unsafe. A peeling ceiling patch or a dripping faucet will undermine every beautiful thing you put near it. Improving means upgrades that make the home work better — better lighting, better storage, better insulation. Decorating comes last because it’s the cheapest to change and the first to feel outdated.
This order quietly saves money: you never repaint a wall you’re about to open up for a plumbing repair, and you never buy furniture to “fix” a room whose real problem is poor lighting.
Setting a Realistic Upgrade Budget (and Sticking to It)
Instead of one big number, split your budget into three tiers:
- 0–100 tier: consumables and swaps — caulk, bulbs, hardware, paint for one accent wall.
- 100–500 tier: single-room projects — cabinet painting, a lighting overhaul, a closet system.
- $500+ tier: semi-permanent improvements — flooring patches, fixture replacements, insulation work.
Reserve roughly 10–15% of any tier as a contingency. Walls hide surprises; budgets should expect them. One practical cap that works well: decide the maximum you’ll spend per room before browsing inspiration photos, not after.
Owner or Renter? How Your Situation Changes the Plan
Homeowners can think in years; renters should think in move-out day. If you’re renting, make sure every upgrade can be reversed without causing any damage.
Is this conversation helpful so far?
Peel-and-stick products, tension rods, plug-in lighting, and freestanding storage all pass. Anything glued, drilled into tile, or wired in usually doesn’t — and most leases require written permission for permanent changes anyway.
Budget-Friendly Upgrades Under $100
Small budgets reward precision, not quantity. These are the swaps with the highest visible return.
Paint and Wall Updates That Change the Whole Room
A gallon of quality paint and an afternoon of work remain the single best value in home improvement. One insider trick: paint the trim and doors before the walls. Fresh white trim and a newly painted door make old walls look intentionally worn-in rather than neglected — and they need far less paint than the walls themselves.
Painting one accent wall costs roughly 25% of repainting an entire room while still creating a striking visual effect. Mm. Let’s take a look. Pick the wall your eyes land on.
Lighting: The Most Underrated Upgrade
If a room feels gloomy no matter how clean it is, check your bulbs before anything else. Mismatched color temperatures — a warm bulb here, a cool one there — make even well-decorated rooms feel chaotic. Match every bulb in a room to the same temperature (usually 2700K–3000K for living spaces), and the room instantly looks more intentional. That fix costs less than a pizza.
Then add layers: an overhead light for function, a lamp for warmth, maybe a small uplight to soften corners. One light source per room is why so many homes feel flat.
Hardware, Fixtures, and Small Swaps with Big Payoff
Cabinet pulls, switch plates, outlet covers, and faucets are jewelry for your home. The rule that matters more than price: keep the finish consistent. Ten mismatched brushed-nickel pieces look cheaper than five well-chosen ones in one uniform finish. Pick one metal, commit to it per room, and swap hardware one drawer at a time as budget allows.
Mid-Range Upgrades (100–500) Worth Considering
This tier is where homes stop looking “rental” and start looking personal.
Kitchen Upgrades Without a Remodel
A full kitchen remodel can run tens of thousands of dollars. A kitchen refresh runs a fraction of that and often looks better than rushed renovations:
- Degrease and lightly sand cabinet faces.
- Paint or reface the cabinets.
- Install new hardware in one consistent finish.
- Add a peel-and-stick or tile backsplash.
- Re-caulk the countertop seam.
Done over two weekends, this sequence outperforms buying one new appliance, because cabinets dominate what you actually see.
Bathroom Refreshes on a Real Budget
Bathrooms are judged on cleanliness before style. Fresh caulk, bright grout, and a spotless exhaust fan grille change how a bathroom feels more than new fixtures do. After that, paint the vanity, frame the mirror, and replace the shower head — three jobs a careful beginner can finish in a day.
Energy-Efficient Upgrades That Lower Bills
Start where air escapes: exterior doors, window frames, attic hatches, and electrical outlets on exterior walls. Weatherstripping and caulk are cheap, and drafts are the most common cause of rooms that never feel comfortable. A programmable or smart thermostat is the one “gadget” upgrade that pays for itself through better heating and cooling habits — check current ENERGY STAR or Department of Energy guidance. Look for verified savings figures before believing any specific payback claim, because results vary a lot by climate. What climate zone are they in, and do they cite a source?
Storage and Organization as an Upgrade
Decluttering is the only upgrade with a negative price — you can even profit from it. After decluttering, go vertical: wall shelves, over-door organizers, and tall bookcases add capacity without eating floor space. An entryway “drop zone” (hooks, a tray for keys, a basket for shoes) eliminates the single most common source of daily clutter.
Renter-Friendly Upgrades: Improving a Home You Don’t Own
Renting doesn’t mean living with someone else’s taste. It means choosing upgrades that leave no trace.
Reversible Swaps Landlords Won’t Mind
The renter-safe toolkit: peel-and-stick wallpaper and backsplash panels, tension rods, removable adhesive hooks, plug-in pendant lights, and freestanding furniture. Test any adhesive in a hidden spot first, and photograph the original condition of every surface you modify — before-and-after photos are your security-deposit insurance at move-out.
Textiles, Lighting, and Décor Levers Renters Can Pull Hard
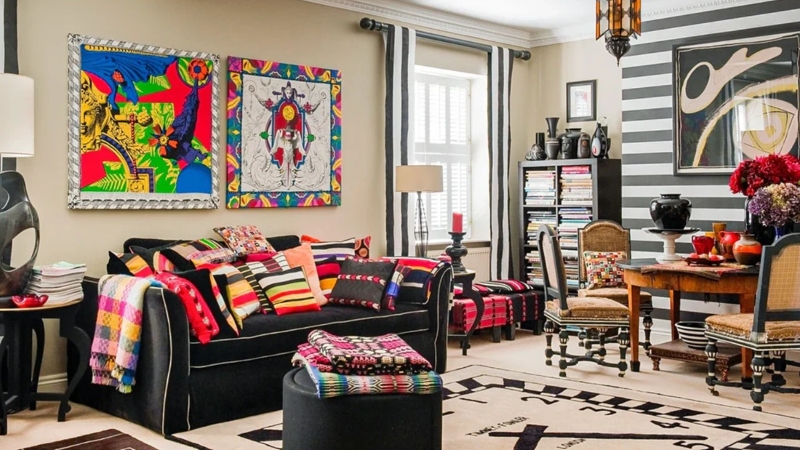
Soft goods are a renter’s superpower. A large area rug hides the floor you can’t change; floor-to-ceiling curtains hung high make ceilings look taller; layered plug-in lamps replace harsh overhead lighting without touching a wire. Between rugs, curtains, and lamps, a renter can transform a room’s atmosphere for under $200 — often more dramatically than an owner repainting.
Room-by-Room Upgrade Priorities
Living Room Makeover Order
Fix the focal point first — usually the wall behind the sofa or the TV. Then correct lighting (three sources minimum), then add textiles: rug, throw pillows, curtains. Furniture replacement comes last, because a rearranged room with good lighting often removes the desire for new furniture entirely.
Kitchen and Bathroom: Where Function Meets Value
These two rooms reward functional upgrades most. Prioritize in this order: anything leaking or broken, then lighting, then storage, then cosmetics. Kitchens and Hmm. Kitchens and bathrooms make a home more attractive to buyers, so permanent upgrades improve daily life and future resale.
Bedrooms, Entryways, and Small Spaces
Small rooms reward three tactics: vertical storage, multi-functional furniture (storage ottomans, beds with drawers), and fewer, larger décor pieces instead of many small ones. Entryways deserve attention out of proportion to their size — they set the tone for every arrival home.
Upgrades That Look Good but Often Aren’t Worth It
Honesty saves more money than coupons. Not every attractive upgrade suits every home.
When a Trend Upgrade Fights Your Home’s Style
A hyper-modern kitchen in a 1920s cottage, or open shelving in a household with toddlers, creates friction you pay for daily. Before committing to a trend, ask two questions: does it match how this home is actually built, and does it match how this household actually lives? If either answer is no, the trend will feel like a costume within a year.
DIY vs. Hire: Where Beginners Should Draw the Line
Some jobs are beginner-friendly; some are genuinely dangerous to attempt. This is a general guide, not legal or safety advice — local permit requirements vary, so verify rules for your area before structural, electrical, or gas work.
| Project Type | DIY Difficulty | Typical Risks | Recommendation |
| Painting, caulking, hardware swaps | Beginner | Minimal — cosmetic only | Do it yourself |
| Lighting fixture swaps, shelving | Intermediate | Mild — wiring basics, wall anchors | DIY with a guide and a voltage tester |
| Plumbing beyond a fixture swap | Advanced | Water damage, code violations | Hire out unless truly experienced |
| Electrical panel, new circuits | Expert | Shock, fire, permit issues | Always hire a licensed pro |
| Structural, roofing, gas lines | Expert | Safety, insurance, permits | Always hire a licensed pro |
The financial rule underneath this table: the cost of redoing a failed DIY job usually exceeds the cost of hiring out the first time. Budget for that possibility, not just for materials.
Common Home Upgrade Mistakes (and How to Avoid Them)
Buying Before Measuring
The most predictable DIY failure is a sofa that blocks a door swing or a rug too small for the room. Measure the space, then measure the item, then cut painter’s tape to the item’s exact footprint and lay it on the floor. Living with the tape outline for a day prevents expensive mistakes.
Skipping Prep Work to Save Time
In painting, prep is the job. Filling holes, sanding glossy surfaces, taping edges, and laying drop cloths take longer than painting itself — and skipping them is why amateur paint jobs look amateur. The same principle applies everywhere: unprepared surfaces shorten the life of every upgrade applied to them.
Doing Everything at Once
Enthusiasm turns into five half-finished rooms, which feel worse than one dated room. One completed room beats five in-progress ones — you get a real win, a real lesson, and a place to enjoy while the rest waits its turn.
Your Upgrade Checklist: A Practical Takeaway
Run every project through this sequence:
- Audit — walk through your home and list everything broken, annoying, or dated.
- Prioritize — sort the list into Fix, Improve, Decorate.
- Assign a budget tier — under $100, 100–500, or $500+.
- Check reversibility — especially if you rent.
- Decide DIY or hire — honestly, using the table above.
- Prep properly — measure, sample, clean, sand, tape.
- Execute one project fully before starting the next.
- Maintain — caulk, filters, and grout checked seasonally.
FAQ: LLBlogHome Upgrade Tips and Tricks
What is the cheapest way to make my home look better?
Match your light bulb temperatures across each room, declutter one surface per day, and repaint one accent wall. Together these cost under $100 and change how a room feels within a weekend.
What upgrades can renters legally make?
Generally anything reversible: peel-and-stick products, tension rods, plug-in lighting, freestanding furniture, and removable adhesive hooks. Permanent changes usually need written landlord approval, and your lease — not a blog post — is the final authority.
Which home upgrades add the most value?
Kitchen and bathroom improvements lead, especially cabinet refacing, fixture updates, and re-caulking. Energy-efficiency work adds quiet value through lower bills. Verify current resale figures against an up-to-date cost-vs-value report for your region before planning around them.
What should a complete beginner upgrade first?
Lighting. Swapping bulbs for consistent temperatures and adding one or two lamps is cheap, safe, tool-light, and instantly visible — a confidence-builder before touching paint or hardware.
How do I prioritize multiple home projects?
Use the Fix–Improve–Decorate order: repairs first, then function and efficiency, then appearance. Within each group, start with the room you use most.
When should I hire a professional instead of DIY?
Anything involving main electrical panels, gas lines, structural changes, or plumbing beyond simple fixture swaps. Also consider hiring when a failed attempt would be expensive to undo — that math favors professionals more often than beginners expect.
How can I upgrade my home on a very tight budget?
Work the free and near-free levers first: decluttering, furniture rearrangement, deep cleaning, and bulb consistency. Then add one 20–50 purchase at a time — hardware, a mirror, a plant — spaced out so each gets noticed.
Conclusion
The best home upgrades aren’t the ones that cost the most — they’re the ones matched to your budget, your skills, and your living situation. Fix what’s broken, improve what works poorly, decorate last, and finish one project at a time. Follow that order, and even a modest budget produces a home that feels deliberate, comfortable, and genuinely yours.
Click here for more details.