Setting up your home decor works best in a fixed order: plan the layout, place large furniture, establish color and lighting, then layer in smart tech, textiles, plants, and accessories. Doing tech last prevents expensive devices from locking in a bad room layout. Most beginners fail because they shop first and plan later.
At a Glance: The Setup Order
| Step | What You Do | Typical Cost Tier | Renter-Friendly? | Biggest Mistake to Avoid |
| 1 | Define style, budget, and priorities | $0 (planning only) | Yes | Shopping before measuring |
| 2 | Plan layout and place big furniture | $$ (largest single spend) | Yes (choose movable pieces) | Pushing all furniture against walls |
| 3 | Build color scheme and wall treatment | –$ | Use peel-and-stick or paint | Following a trend you’ll tire of |
| 4 | Layer lighting (ambient, task, accent) | –$$ | Yes | Relying on one ceiling fixture |
| 5 | Add the smart tech layer | –$$ | Check lease rules | Buying devices before checking compatibility |
| 6 | Style with textiles, plants, accessories | $ | Yes | Matching everything too literally |
| 7 | Refine and maintain | $0 | Yes | Declaring the room “done” in week one |
What Does “Decor Meets Tech” Home Setup Actually Mean?
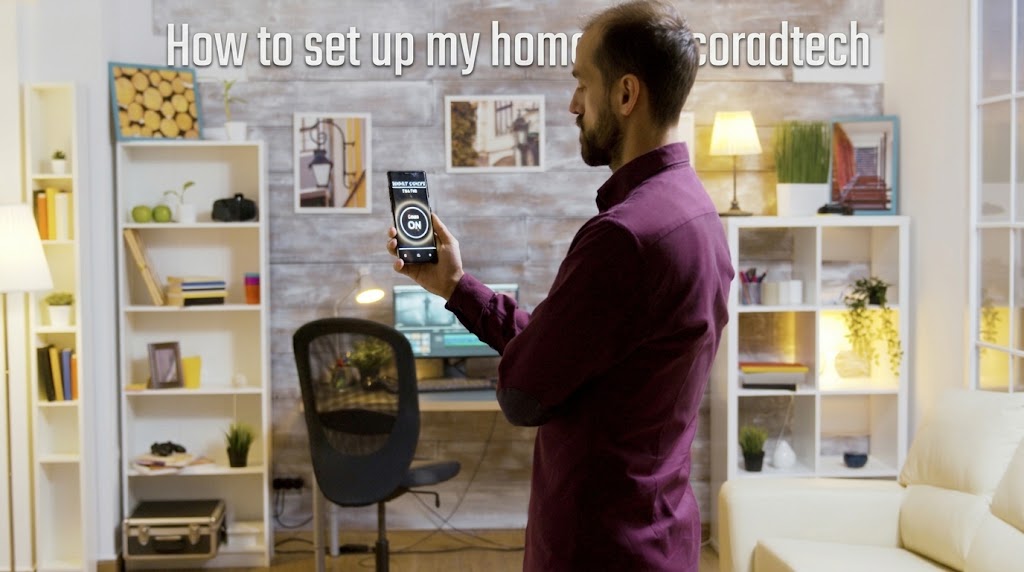
Setting up your home decor the modern way means treating technology as one of the design layers, not an afterthought bolted onto a finished room. In practical terms, you decide where light, sound, temperature control, and screens live in the room — and then make them blend into the styling rather than fight it. This is what some people call a “decoradtech” approach: decoration and technology planned together from the start.
The reason this matters more now than a few years ago is a shift in taste. Warm, inviting interiors are replacing gadget-filled spaces, with technology kept out of sight or designed to blend subtly into the surroundings. A smart speaker on a shelf should look like a styled object, not a landing pad for cables.
A useful way to think about every device in your home is to sort it into one of three categories:
- Invisible tech — hubs, sensors, smart plugs. Nobody should ever see these. Hide them in drawers, behind furniture, or on closet shelves.
- Accent tech — smart bulbs, LED strips, ambient lamps. These change how the room feels, so treat them like lighting fixtures, with intentional placement.
- Functional tech — thermostats, video doorbells, smart locks. These live in fixed, high-traffic spots, so your job is to make their placement look deliberate.
Each category demands a different decor treatment, and knowing which is which stops you from over-decorating around devices that should never have been visible in the first place.
How Do You Define Your Style, Budget, and Room Priorities?
Start with what you already own. Walk through your home and pull out the five objects you genuinely love — a lamp, a throw, a piece of art. Put them together on a table and you’ll usually see a pattern: a color family, a texture, a mood. That pattern is your style starting point, and it’s more reliable than a Pinterest board of someone else’s house.
Next, set a budget per room rather than one number for the whole home. A simple split that works for most beginners:
- Spend here: sofa or bed, main lighting fixtures, anything you touch every day.
- Save here: throw pillows, wall art, decorative objects, plants.
- Skip entirely (for now): trend pieces with a short lifespan.
Before buying anything, complete this three-item checklist for each room: measure the space and note window and outlet locations, photograph the room from every corner, and sort everything currently in it into keep, donate, and discard piles. One hour of this saves hundreds of dollars in returns later.
One room at a time. This is the single biggest budget protector. A finished room — even a small one — gives you momentum and a clear sense of your own taste. Five half-decorated rooms give you clutter and regret.
Budget spend guide by room:
| Room | Splurge On | Save On | Highest-Impact First Purchase |
| Living room | Sofa, coffee table, floor lamp | Pillows, candles, small art | Lighting (changes the room in one evening) |
| Bedroom | Mattress, bedding, blackout curtains | Nightstand decor, wall prints | Bedding + blackout solution |
| Entryway | Mirror or console | Hooks, trays, small rug | A mirror (adds light and space instantly) |
| Kitchen | Task lighting, counter organization | Open-shelf styling, textiles | Under-cabinet or pendant lighting |
| Home office | Chair, desk lamp | Shelving, desk accessories | Proper task lighting |
How Do You Get the Layout and Furniture Placement Right?
Layout comes before everything you buy. The method professionals use is simple: anchor first, layer second. Identify the anchor of the room — usually the sofa in a living room, always the bed in a bedroom — place it first, and then add every other piece relative to it, working from large to small.
A few placement rules cover most situations:
- Don’t line the walls. Floating furniture a few inches off the wall, even in small rooms, makes spaces feel more intentional and less like a waiting room.
- Create a focal point. Every room needs one — a fireplace, a media wall, a large window, a statement mirror. Arrange seating toward it.
- Mind the walkways. Keep 30–36 inches for main walking paths and about 18 inches between a coffee table and sofa. If you can’t walk the room naturally with your eyes closed, the layout is wrong.
- Scale down in small spaces. Choose furniture with legs and open frames so light passes underneath. Space-saving pieces like nesting tables, storage ottomans, and wall-mounted desks earn their footprint twice.
Do this step on paper or with a free floor-planning app before moving a single heavy item. The room you sketch is cheaper to redesign than the room you’ve already furnished.
How Do You Build Your Color Scheme and Wall Treatments?
A workable palette needs only three roles: a base (the large, neutral areas — walls, big furniture), a secondary (rugs, curtains, one or two larger pieces), and an accent (pillows, art, small objects — the color you’d miss if it disappeared). Keep the base neutral and shift the accent with the seasons or your mood. This keeps a room current without redecorating every year.
Walls are the cheapest transformation available, and renters have more options than they think:
- Accent wall — paint one wall, ideally the one behind your focal point or headboard.
- Peel-and-stick wallpaper or paneling — removable, and the current generation looks far better than older versions.
- Wall molding — uses affordable trim strips to create a paneled wall effect, giving the room an upscale appearance without the high cost.
- Large-scale art or a gallery wall — fills vertical space and replaces the need for more furniture.
One caution on color: dark and moody tones are popular right now, and they can look fantastic — but commit to a dark color only in a room you’ve actually seen change with your lighting throughout the day. Paint a large sample board, live with it for a week, then decide.
How Do You Layer Lighting — and Where Does Smart Lighting Fit?
Lighting is the step most beginners skip, and the one experts never do. A room lit only by an overhead light can feel dull and lifeless, no matter how well the furniture is arranged. Build three layers instead:
- Ambient — the general light: a ceiling fixture, or better, a pair of sources so no single fixture carries the room.
- Task — focused light where you do things: a reading lamp, under-cabinet kitchen light, desk lamp.
- Accent — light aimed at something: a picture light, an uplight behind a plant, a lamp on a shelf.
Smart lighting slots naturally into these layers. Smart bulbs in your ambient lamps let you shift from bright white daylight for cleaning to warm dim light for evenings; a smart dimmer or plug makes the accent layer adjustable without new wiring. Set schedules so lamps turn on at dusk — a timed warm lamp does more for a cozy atmosphere than any single decor purchase.
A practical color-temperature rule: keep bulbs at 2700K (warm white) in living rooms and bedrooms, and reserve cooler light for kitchens, bathrooms, and workspaces. Mixing a cool bulb into a warm room is the most common lighting mistake — and the easiest to fix.
How Do You Add Smart Tech Without Ruining the Look?
The smart layer comes after layout and lighting for one reason: devices should serve the room, not define it. Build a starter stack in this order — smart bulbs first (immediate, visible impact), then smart plugs (make existing lamps “smart” for a few dollars), then a hub if your devices come from multiple brands, then the bigger items: smart thermostat, motorized shades, video doorbell.
Before buying anything connected, check three things: which ecosystem you already live in (phone, speaker, assistant), whether the device supports the Matter standard so it won’t be stranded by brand, and whether your rental or home’s wiring supports it — smart switches often need a neutral wire, while smart bulbs and plugs need nothing.
The decor part is mostly wire discipline and placement:
- Run cables through adhesive channels painted to match the wall, or behind cable raceways, before you style a single shelf.
- Choose furniture that hides tech: a media console with ventilated closed cabinets, a nightstand with a rear cable pass-through, a side table with a built-in charging drawer.
- Give visible devices a styled home — a smart speaker sits on a plant-filled shelf where it reads as an object, not a device.
Tech-to-decor matching:
| Device | Hide It or Style It? | Best Placement | Decor Treatment |
| Hub / smart plugs | Hide | Closet shelf, drawer, media cabinet | None — never visible |
| Smart bulbs | Invisible (inside lamps) | Existing ambient and accent lamps | Match lamp shade to room palette |
| LED strips | Half-hide | Behind TV, under cabinets, behind headboard | Indirect glow only, never exposed dots |
| Smart thermostat | Style (it’s on show) | Eye-level wall in hallway/living area | Choose finish that matches hardware |
| Video doorbell | Functional | Front door | Match faceplate to door hardware |
| Smart speaker | Style | Shelving among books and plants | Group with objects, add a cable-free surface |
| Motorized shades | Styled function | Windows | Fabric choice = decor decision |
Honest limitations: renters should confirm landlord rules before hardwiring anything like a video doorbell or smart lock; older homes may lack the neutral wiring some smart switches require; and whole-home systems are best left to a later phase, once you’ve lived with the starter stack for a season.
How Do You Style the Room with Textiles, Plants, and Accessories?
This is the fun layer — and the one where restraint pays. Textiles do the atmospheric heavy lifting: a chunky throw, two or three pillow covers in your accent color, a rug large enough that at least the front legs of your seating sit on it. Swap covers seasonally instead of buying new pillows every year.
Plants are the most affordable natural decor there is, and low-light varieties make failure hard: pothos, snake plants, ZZ plants, and peace lilies tolerate neglect and dim corners. One large plant beats five small ones — a tall snake plant in an empty corner fills space, softens hard furniture lines, and costs less than most wall art.
Styling surfaces (shelves, coffee tables, consoles) is the ideal beginner skill because it teaches balance, scale, and texture with zero risk. A five-rule checklist you can apply to any surface in ten minutes:
- Group in odd numbers — three or five objects, never matching sets.
- Vary the heights — something tall, something medium, something flat.
- Mix textures — pair hard with soft (ceramic + woven, glass + wood).
- Leave negative space — empty room on the shelf is part of the design.
- Add one living thing — a trailing plant or fresh stems in a vase.
What’s the Room-by-Room Setup Playbook?
Living room: Anchor with the sofa facing your focal point. Add the rug (sized large), coffee table, and one floor lamp for the third lighting source. Smart tech: bulbs in table and floor lamps, a smart plug on the TV setup to cut standby power, hub hidden in the media cabinet. Style last: pillows, throw, plant, three-object grouping on the coffee table.
Bedroom: Treat it as a calm zone. Bed placement with a headboard against the solid wall, blackout curtains or shades, and lighting kept warm and dimmable. Tech should be minimal here — a smart bulb or dimming plug on each nightstand lamp, phone charging outside arm’s reach. Skip screens and speakers if sleep quality matters to you.
Entryway: Highest return per square foot in the house. A mirror, a console or slim table, a hook row, and a small lamp on a smart plug that comes on at dusk so you never walk into a dark house.
Kitchen and small spaces: Light first — under-cabinet task lighting makes more difference than any accessory. Then counter organization (everything on the counter either used daily or stored away), and one styled spot, like open shelving with grouped ceramics.
What Are the Most Frequent Setup Errors, and How Can You Correct Them?
- Buying decor before the layout. You end up with pieces that don’t fit the room or each other. Fix: stop shopping, sketch the layout, return what you can, work the rest into the plan.
- Buying tech before compatibility checks. Devices from mismatched ecosystems won’t talk to each other. Fix: pick one ecosystem, prefer Matter-certified devices, return early within the window.
- Matching everything. A room where every pillow and frame matches looks like a catalog and feels like nobody lives there. Fix: keep the base neutral, vary textures, introduce one “wrong” object you love.
- Lighting last (or never). The ceiling fixture alone flattens even great rooms. Fix: add two lamps this week — it’s a 10-minute fix with the biggest visual return of anything on this list.
- Following trends you don’t actually like. Every trend cycle expires; a dark moody wall you chose for the photo and not the feeling becomes next year’s repaint. Fix: sample first, and let your own five-objects test (from Step 1) outweigh any trend list.
- Rental mistakes that cost the deposit. Nail holes in tile, painted radiators, adhesive on textured walls. Fix: use removable hooks and strips rated for your wall type, keep originals of everything you replace, photograph walls at move-in.
Your Complete Setup Checklist
Print or screenshot this list and work top to bottom:
- Photograph and measure every room; sort belongings into keep, donate, discard.
- Pull your five favorite objects and define your palette (base, secondary, accent).
- Set a per-room budget; choose one room to finish first.
- Sketch the layout; place the anchor piece, then large to small.
- Paint or treat one wall; hang art or molding.
- Add three lighting layers; replace any cool bulbs in living spaces with warm ones.
- Add the smart layer: bulbs, plugs, hub — hiding invisible tech, styling visible tech.
- Run and conceal all cables before styling.
- Add textiles: rug, curtains, throw, pillows.
- Place one or two large plants.
- Style surfaces using the five rules.
- Use it for two weeks before making any adjustments.
- Is this conversation helpful so far?
Frequently Asked Questions
How can I begin decorating my home from the ground up?
Start with the layout, not with shopping. Measure the room, sketch where the anchor piece (sofa or bed) goes, and plan walkways before buying anything. Next, choose a three-color scheme and allocate a separate budget for each room you plan to decorate.
A room planned in this order comes together faster and cheaper than a room furnished piece by piece.
What is “decoradtech” in home decorating?
It’s a blend of “decor” and “technology” — decorating where smart devices are planned as part of the design from the beginning. In practice, it means hiding invisible tech like hubs and plugs, treating smart lighting as a design layer, and choosing finishes and placements for devices the way you would for any accessory.
How can I make my living room look elegant and inviting while keeping decorating costs low?
Spend in order of visual impact: lighting first (two warm lamps beat everything else), then textiles (a rug and pillow covers), then one accent wall or wall treatment, then a large plant, then small accessories. Secondhand furniture with good bones and a coat of paint stretches the budget further than new budget furniture.
Which smart home devices are worth adding first?
Smart bulbs and smart plugs. They’re inexpensive, require no wiring, work in any rental, and deliver the most noticeable change to how a room looks and feels. Add a hub only when your devices span multiple brands, and larger items like a smart thermostat or motorized shades after you’ve lived with the basics.
The bottom line: set up your home decor in order — layout, furniture, color, lighting, then tech, then styling — and let technology serve the room instead of defining it. Plan first, buy last, and finish one room at a time.
Click here for more details.